
Quickstart guide
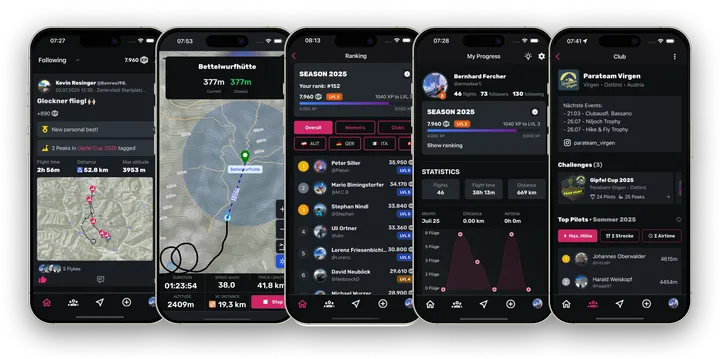
Getting started is not hard. Learn how to join your first challenge in a few steps.
1. Create an account
The first step is your own Sidekik account. Go to https://app.sidekik.cloud/signup and enter your email, username and password.
You will be asked for a few more details. Confirm with the create-account button and you can upload flights and share them with friends.
2. Find your way around
If you use Sidekik on your phone — like 95% of pilots — you will see the bar at the bottom with the 5 main items, as in many apps (on desktop the same functions sit in the left nav).
Home: The feed of recent flights submitted to Sidekik, sorted by landing date and time. At the top you can filter the feed to a club. If you already belong to a club, that one is selected by default. Filters are saved. Tapping a flight (title, description, map or “analyse flight”) opens the details and the interactive map.
Groups: An overview of the challenges, monthly leaderboards and clubs available to you.
Upload: Submit a flight. You can also use XContest sync — more on that below.
Map: All peaks where you can currently score. Peaks you have already flown are shown in pink.
Profile: Your progress, statistics and flights. Top right, the gear opens settings (you can change your profile picture there). Log out via the profile picture, top right → Logout. Your public profile is under the profile picture → “My profile”.
3. Join a challenge
Under Groups you will find every challenge you have access to. Find the one you want (your club challenge or a public one) and tap “View challenge”.
The challenge page opens with the description, rules and waypoints. Read the description carefully before you join.
Tap “Join challenge” and you are on the leaderboard — even with zero points. From then on, flights submitted inside the challenge window are checked for challenge peaks and you earn points.
4. Export and download waypoints
You do not have to memorise the waypoints. Download them and open them in a phone flying app such as FlySkyHy or XCTrack, or transfer them to a GPS (Skytraxx and similar).
On the challenge, below the map, you will find “Export waypoints”. Choose .xctsk or .wpt. For FlySkyHy and XCTrack, .xctsk is better because it includes the radius. .wpt works on more devices. You can also read how to plan a flight with FlySkyHy.
5. Submit a flight
The easiest way is automatic XContest import, if you already upload there. How that works is in this article.
You can also upload a flight to Sidekik by hand.
First sync your flight (.igc file) to your phone or computer. Follow the instructions for your app or GPS. When you have the file, tap the Upload button in the middle, then tap the field to pick the .igc. Upload and processing start. While that runs you can name the flight and add a short debrief for yourself and your clubmates. You can also add photos — or do all of that later.
When processing is done, tap “Save flight” and you go straight to the analysis.
Please only upload your own flights.
6. Change flight details
You can still change the title and description later, or add photos. Find the flight in the feed, tap the three dots top right and choose “Edit”. Change the details, add photos and save.
7. Read the leaderboard
The leaderboard lists every participant, sorted by points. Tap a participant (arrow on the right) to open that pilot’s detail view. You can see which peaks were flown when and how many points they scored. For a full analysis, tap the magnifying glass.
Closing
That is the core of Sidekik in a few steps.
Have fun trying the features and browsing your friends’ flights.
Good flights, happy landings — see you soon!