
3D Replay
With 3D Replay, Sidekik turns the track of a flight into a flight through the real mountains. The camera follows your glider, and you can watch the whole flight again, look around and record your favourite part as a short video.
This guide shows how to open the replay, control it, record a clip and share it. You need a flight with a GPS track first: see Tracking a flight or Getting your flights into Sidekik.
1. Open the replay
Open a flight in the app and tap 3D Replay, right next to Detail map.
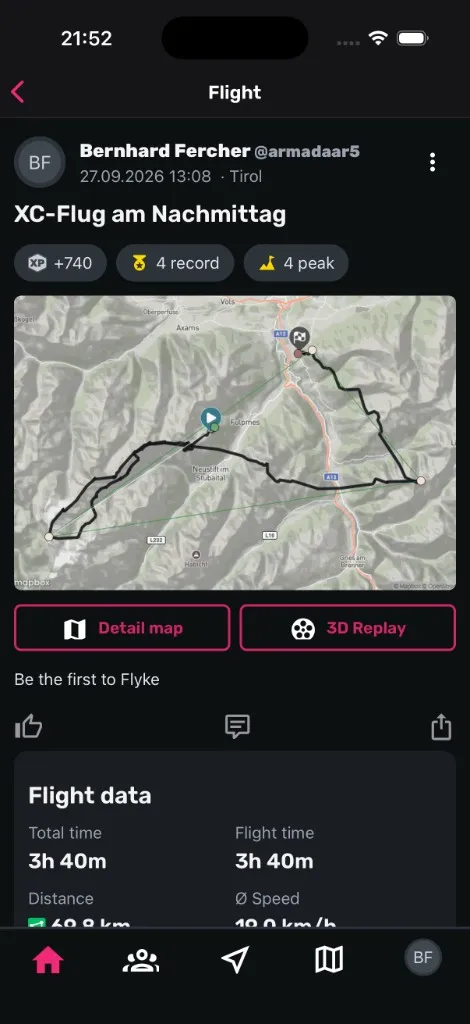
The replay works with every flight that has a GPS track, whether you tracked it with Sidekik or uploaded it as an IGC or GPX file. Flights you entered by hand don’t have a track, so the button doesn’t show up for them.
Good to know: The map and the terrain are loaded when you open the replay, so you need an internet connection. For longer flights it can take a few seconds the first time.
2. Watch your flight
The replay starts at takeoff with the camera right behind you. Your name marks your position, and the summits around you are labelled.
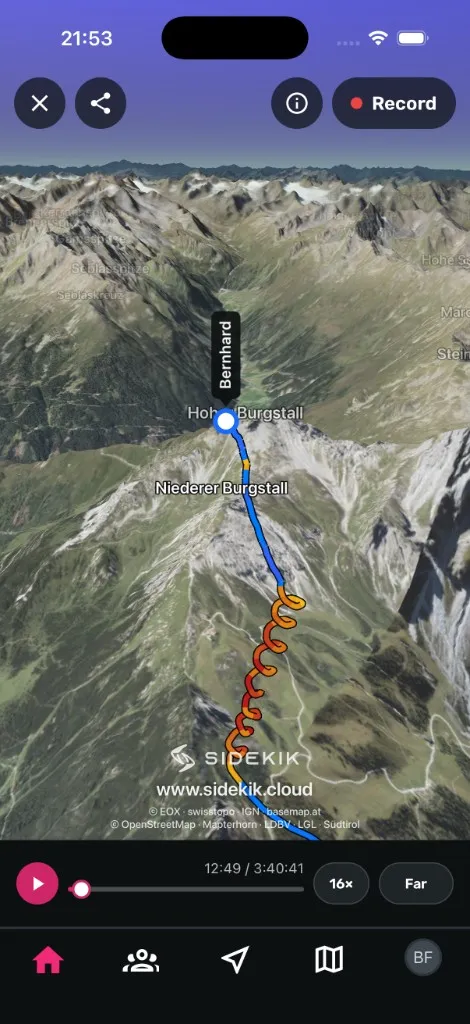
The track is coloured like in live tracking: orange to dark red when you climb, blue to violet when you sink. On a Hike & Fly the ascent has its own colour.
You control the replay with the bar at the bottom:
- Play and pause: tap the play button, or tap the picture.
- Jump: drag the timeline to any point of the flight. The time shown is your real flight time.
- Speed: tap to switch between 1×, 2×, 4×, 8× and 16×. The replay starts at 4×.
- Zoom: tap to switch between Close, Normal and Far.
Hold the speed or zoom button for a second and slide your finger up or down to set any value in between.
Sidekik plays the time you spent circling in thermals a little faster, so long flights stay interesting. At the end, the camera pulls back and shows the key numbers of your flight.
3. Look around
Drag the picture with your finger. The camera lets go of your glider and you can look around freely. Tap Follow at the top and the camera flies back behind you.
4. Record a video
- Tap Record at the top right. The replay pauses and the settings open.
- Choose what the video shows (see below).
- Drag the timeline to where your clip should start.
- Tap Start Recording. The replay plays and is recorded.
- Tap Stop when your clip should end.
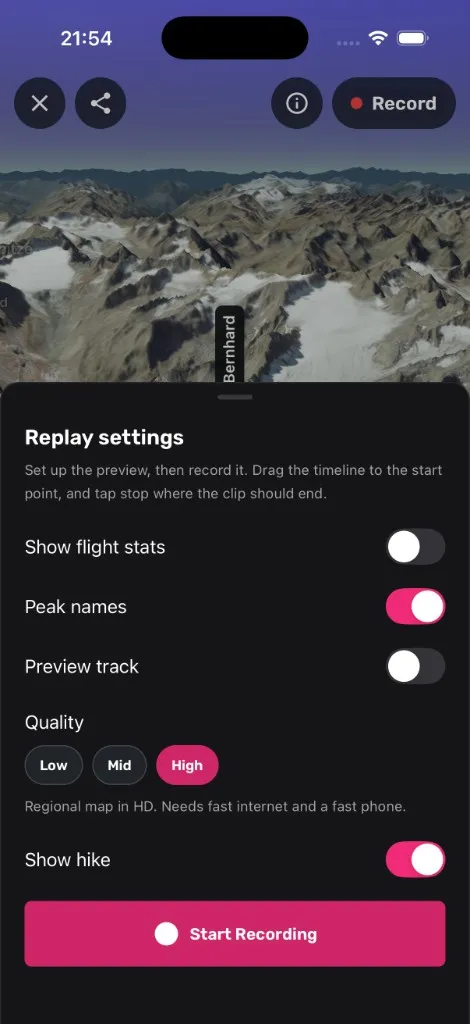
The settings:
- Show flight stats: shows altitude, height above ground, speed and vario in the video.
- Peak names: shows the names of the summits.
- Preview track: also shows the part of the track that is still ahead of you.
- Quality: Low uses satellite imagery, Mid a detailed regional map, High the same map in HD. High looks best but needs a fast connection and a fast phone.
- Show hike: on a Hike & Fly, decides whether the ascent is part of the video.
The buttons on the screen are not part of the video, only the flight and the Sidekik logo. Keep the app open until the video is finished. Then you can save it to your photos or share it right away. The video is in portrait format.
5. Share the replay
It doesn’t have to be a video. Tap the share button at the top left to send a link to the 3D replay of your flight. Your friends can then watch it themselves and look around wherever they like.
Tips
- Pick a highlight. A climb next to a summit, a valley crossing or the landing approach make better clips than the whole flight.
- Set speed and zoom before you record. The video shows exactly what you see on screen. Close or Normal works well for thermals, Far for long glides.
- Turn on peak names. Your friends see right away where you were flying.
- Use Wi-Fi for High quality. The HD map loads a lot of data.
Related guides
Still have questions? Write to us at [email protected].